Today I received a demand from our programmers to install a tool called iceScrum.
I thought it would be a good idea to blog how I set it up.
A little quote to point out what iceScrum just is.
IceScrum is an agile management tool created by french students. IceScrum is a WebApplication that runs under a Tomcat server using a MYSql Database with GPL License. The tool is focused on Scrum only and brings basic functionalities to manage Scrum teams but with an original user interface.
You can find more information on there website http://www.icescrum.org/en/
Don’t ask me any details on what the program can do because I only installed it :-S
Time to get our hands dirty and start installing
First of all I’m installing it on a vmware virtual environement with following specs
- 1 vCPU
- 1,5 GB Ram
- Hardisk – 25GB
- Network to your operational lan
The OS will be a SUSE Linux Enterprise Server 11 64-bit (SLES)
I will not go into the basics of installing a SLES (as usual 🙂 ).
1 Installing pre-required Software
W’ll be needing tomcat5, java, mysql, apache (more for me then for the app you’ll see later) and php5
Because SLES has a beautiful GUI let’s use it for once
Open the Software Manager
Search for java and add the following packages:
– jakarta-commons-collections-tomcat5
– jakarta-commons-daemon
– jakarta-commons-dbcp-tomcat5
– jakarta-commons-logging
– jakarta-commons-pool-tomcat5
– java-1_6_0-ibm
– java-1_6_0-ibm-fonts
– jpackage-utils

Search for tomcat and add the following packages:
– tomcat6
– tomcat6-acmin-webapps
– tomcat6-jsp-2_1-api
– tomcat6-lib
– tomcat6-servlet-2_5-api

Search for mysql and add the following packages:
– libmysqlclient_r15-32bit
– libqt4-sql-mysql
– libqt4-sql-mysql-32bit
– mysql
– mysql-client
– php5-mysql

Search for apache and add the following packages:
– apache2-prefork
– apache2-utils
– libapr-util
– libapr1
– libtcnative-1-0

Search for tomcat and add the following packages:
– Apache2-mod_php5
– php5
– php5-ctype
– php5-dom
– php5-hash
– php5-iconv
– php5-json
– php5-mcrypt
– php5-pdo
– php5-suhosin
– php5-tokenizer
– php5-xmlreader
– php5-xmlwriter
– php5-zip

2 Configuring Software
Before installing iceScrum we will have to configure the pre-required software
2.1 Tomcat6 Configuration
Open the file /etc/tomcat6/tomcat-users.xml (add users for the sql webapp)
Change:
|
<tomcat-users> <!– <role rolename="tomcat"/> <role rolename="role1"/> <user username="tomcat" password="tomcat" roles="tomcat"/> <user username="both" password="tomcat" roles="tomcat,role1"/> <user username="role1" password="tomcat" roles="role1"/> –> </tomcat-users> |
To:
|
<tomcat-users> <!– <role rolename="tomcat"/> <role rolename="role1"/> <user username="tomcat" password="tomcat" roles="tomcat"/> <user username="both" password="tomcat" roles="tomcat,role1"/> <user username="role1" password="tomcat" roles="role1"/> –><role rolename="manager"/> <user username="admin" password="icescrum" roles="manager"/> </tomcat-users> |
Open the file /usr/bin/dtomcat6 (configure tomcat to start java with more reserved memory, icescrum will run faster)
Change:
|
#!/bin/bash # Get the tomcat config (use this for environment specific settings) # Don’t read a conf file again – bnc#446598 #if [ -z "${TOMCAT_CFG}" ]; then # TOMCAT_CFG="/etc/tomcat6/tomcat6.conf" #fi |
To:
|
#!/bin/bash JAVA_OPTS="-X:MaxPermSize=1024m -Xmx1024m" # Get the tomcat config (use this for environment specific settings) # Don’t read a conf file again – bnc#446598 #if [ -z "${TOMCAT_CFG}" ]; then # TOMCAT_CFG="/etc/tomcat6/tomcat6.conf" #fi |
Start Tomcat6
| /etc/init.d/tomcat6 start |
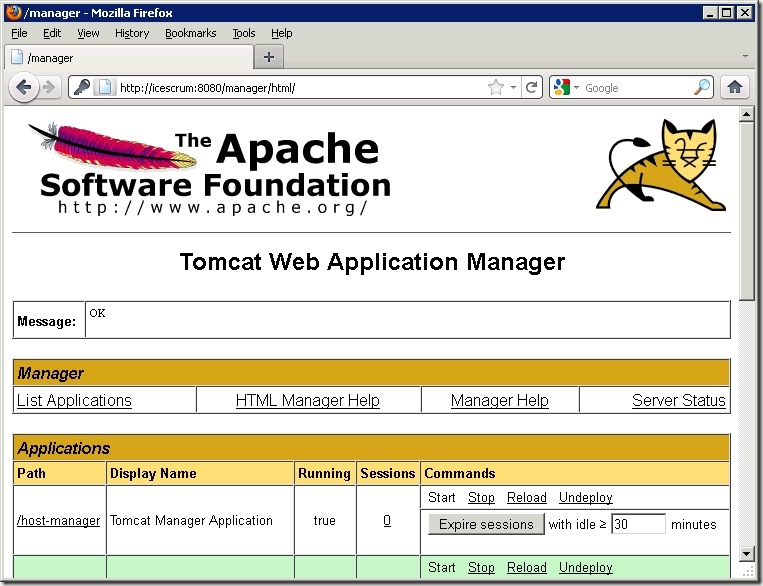
To check that tomcat is running open a browser to http://<hostname>:8080/manager/html

login with the credentials you entered in the configuration file
You will see a management page with the status of all tomcat applications.
2.2 MySQL Configuration
Start configuration by entering the following command in the console
| mysql_install_db –user=mysql |
Start Mysql
| /etc/init.d/mysql start |
Make Mysql more secure
| /usr/bin/mysql_secure_installation |
Follow the instruction on the screen
| NOTE: RUNNING ALL PARTS OF THIS SCRIPT IS RECOMMENDED FOR ALL MySQL SERVERS IN PRODUCTION USE! PLEASE READ EACH STEP CAREFULLY! In order to log into MySQL to secure it, we’ll need the current password for the root user. If you’ve just installed MySQL, and you haven’t set the root password yet, the password will be blank, so you should just press enter here. Enter current password for root (enter for none): OK, successfully used password, moving on… Setting the root password ensures that nobody can log into the MySQL root user without the proper authorisation. You already have a root password set, so you can safely answer ‘n’.Change the root password? [Y/n] y New password: Re-enter new password: Password updated successfully!Reloading privilege tables.. … Success! By default, a MySQL installation has an anonymous user, allowing anyone to log into MySQL without having to have a user account created for them. This is intended only for testing, and to make the installation go a bit smoother. You should remove them before moving into a production environment.Remove anonymous users? [Y/n] y… Success! Normally, root should only be allowed to connect from ‘localhost’. This ensures that someone cannot guess at the root password from the network.Disallow root login remotely? [Y/n] y… Success!By default, MySQL comes with a database named ‘test’ that anyone can access. This is also intended only for testing, and should be removed before moving into a production environment.Remove test database and access to it? [Y/n] y- Dropping test database… … Success!- Removing privileges on test database… … Success!Reloading the privilege tables will ensure that all changes made so far will take effect immediately.Reload privilege tables now? [Y/n] y… Success!Cleaning up…All done! If you’ve completed all of the above steps, your MySQL installation should now be secure.Thanks for using MySQL! |
2.3 Install phpmyadmin
phpmyadmin is not a pre-required software for iceScrum but I like to use it to manage the mysql database.
Download the latest phpmyadmin package from http://www.phpmyadmin.net/home_page/downloads.php
Extract the package to /srv/www/htdocs/
Rename the folder phpmyadmin-<version> to phpmyadmin
Create a folder named config in the phpmyadmin folder and add full rights for everyone
| mkdir /srv/www/htdocs/phpmyadmin/configchmod 777 /srv/www/htdocs/phpmyadmin/config |
Start Apache2
| /etc/init.d/apache2 start |
Open a browser to http://localhost/phpmyadmin/setup or
http://<servername or server-ip>/phpmyadmin/setup
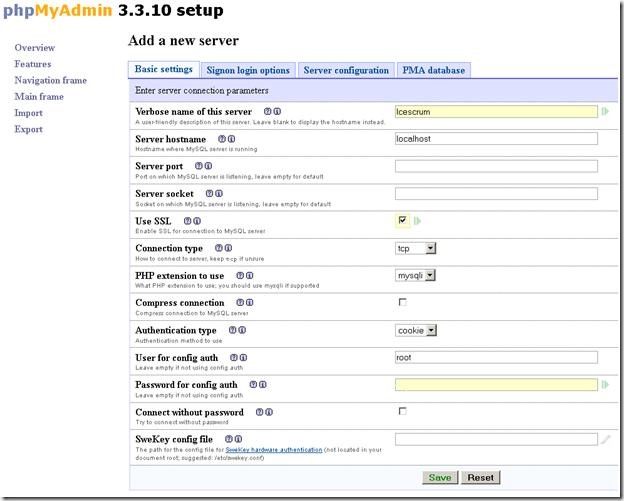
Click the New server button
Enter the following data and click save
| Verbose name of this server: Icescrum Use SSL: yes User for config auth: root Password for config auth: icescrum123 |
Remove the folder setup
| rm /srv/www/htdocs/phpmyadmin/setup |
3 Create the icescrum database
Open a browser to http://localhost/phpmyadmin/ or http://<servername or server-ip>/phpmyadmin/
Login: root
Password: icescrum123

Create the database icescrum 
Click Create

Click On privileges

Click on Add a new user

User name: icescrum
Password: icescrum123
Select: Grant all privileges on database “icescrum”
Click Go
4 Install iceScrum
Download the latest war package from http://www.icescrum.org
Unzip the war file to /srv/tomcat6/webapps/
Open the file /srv/tomcat6/webapps/icescrum/WEB-INF/classes/config.properties
Change:
|
#Data Source #dataSource.driverClassName=org.gjt.mm.mysql.Driver #dataSource.dialect=org.hibernate.dialect.MySQLInnoDBDialect #dataSource.url=jdbc:mysql://localhost:3306/database?useUnicode=true&characterEncoding=utf8&autoReconnect=true #dataSource.username=root #dataSource.password=password #dataSource.dbCreate=update |
To:
|
#Data Source dataSource.driverClassName=org.gjt.mm.mysql.Driver dataSource.dialect=org.hibernate.dialect.MySQLInnoDBDialect dataSource.url=jdbc:mysql://localhost:3306/icescrum?useUnicode=true&characterEncoding=utf8&autoReconnect=true dataSource.username=icescrum dataSource.password=icescrum123 dataSource.dbCreate=update |
Remove the file /srv/tomcat6/webapps/icescrum/WEB-INF/lib/serverlet-<version>
| rm /srv/tomcat6/webapps/icescrum/WEB-INF/lib/serverlet-<version> |
Change permissions on the folder /usr/share/tomcat6
| Chmod 777 /usr/share/tomcat6 |
Restart tomcat6
| /etc/init.d/tomcat6 restart |
Open a browser to http://localhost:8080/icescrum/ or
http://<servername or server-ip>:8080/icescrum/

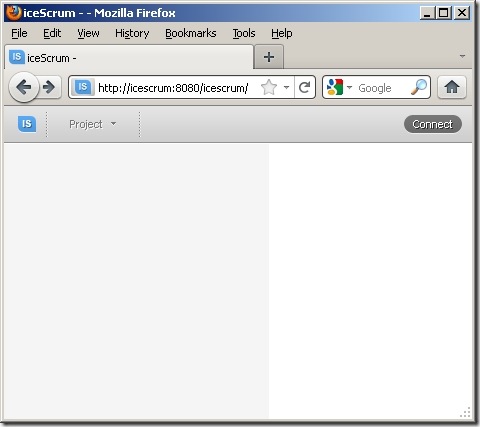
On the initial page you will not see much just the toolbar.
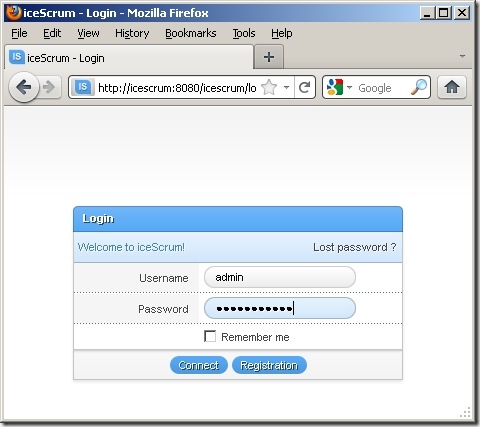
Here you can click connect.

A login box will appear here you can use the standard Administrator login
Standard Administrator login:
Username: admin
Password: adminadmin!
When you are logged in you can start creating teams and projects.
5 Extra
To make my life a bit easier in managing the server I made the following modifications
5.1 Add an admin webpage with all the admin urls
Create a file in /srv/www/htdocs named admin.html
| touch /srv/www/htdocs/admin.html |
Open the file /srv/www/htdocs/admin.html
|
<html> <h1><b><u>Admin Page</u></b></h1><br> <a href="http://<hostname>:8080/icescrum">Icescrum Application</a><br> <a href="http://<hostname>/phpmyadmin">Icescrum phpmyadmin</a><br> <a href="http://<hostname>:8080/manager/html">Icescrum Tomcat manager</a><br> <a href="http://<hostname>:5801/">Icescrum VNC Remote Desktop</a><br> </html> |
Do not forget to change <hostname> with you’re hostname or ip.
You can now open a browser and go to http://localhost/admin.html or
http://<servername or server-ip>/admin.html
5.2 Configure a redirect on standard website
Create a file in /srv/www/htdocs named index.php
| touch /srv/www/htdocs/index.php |
Open the file /srv/www/htdocs/index.php
| Redirecting to the proper site …<?php header(‘Location: http://<hostname>:8080/icescrum’); /* Stuur de browser naar www.site.be */?> |
Do not forget to change <hostname> with you’re hostname or ip.
5.3 Configure services to start on boot
Open Yast and open system services (runlevel)
Go to the Expert mode

Add Apache2, MySql and tomcat6 to runlevel 3 and 5


In your Datasource snippet, you have “strong” tags around icescrum, assuming those don’t actually go in the syntax and were intended for your blog right?
Indeed doesn’t belong there thx wordpress :-s
Thanks for noticing
np…
at what point in the instructions did you actually deploy the app to tomcat?
At point 4 install icescrm -> Unzip the war file to /srv/tomcat6/webapps/
I didn’t use the TomCat web application manager because the deployment kept crashing for some reason
i had error “HTTP Status 404 – ” when open http://localhost:8080/icescrum/
why ?
thanks
Sorry for the late reply (It has been busy …)
Difficult to say, without extra info.
HTTP Status 404 is a Not Found error message
Is the icescrum webapp enabled on you’re tomcat