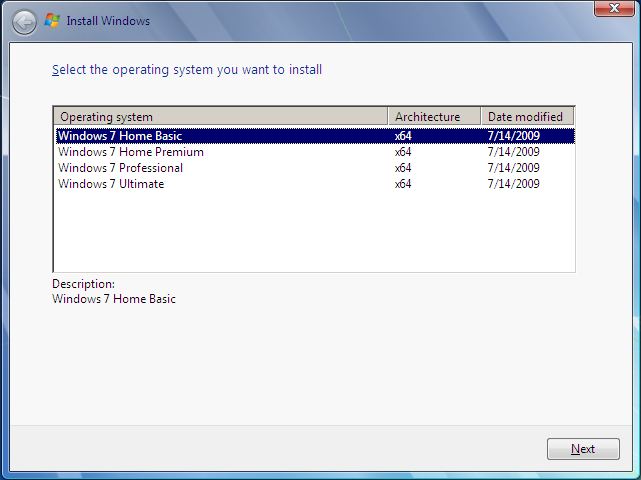
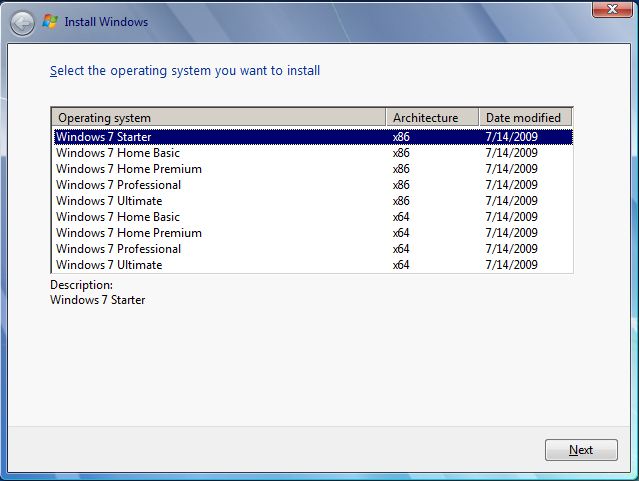
When you buy a Microsoft Windows 7 in the store, the only version you can install is the version you bought. Well there is a trick to show all the versions this way you can install any version you want from basic to ultimate.
To accomplish this you just have to delete the ei.cfg file in the folder /sources/ on the windows DVD
And burn the DVD again. If you have the iso on your computer you can use the eicfg_delete_utility from http://code.kliu.org/misc/winisoutils/ download here.
The ei.cfg Removal Utility is a simple tool that will remove the ei.cfg from any Windows ISO disc image, thereby converting the image into a “universal disc” that will prompt the user to select an edition during setup. This tool works by toggling the deletion bit in the UDF file table, eliminating the need for unpacking and rebuilding the ISO, which means that this is extremely fast (the process of patching the ISO to remove ei.cfg takes only a fraction of a second), and the process is easily reversible (running the utility on a disc image patched by this utility will restore the disc image to its original state).
You can also modify the ei.cfg file this way you can choose what type of DVD you have with the version of windows 7 you want.
The content of the ei.cfg file looks like this:
[EditionID]
Ultimate
[Channel]
Retail
[VL]
0
You can change the version of windows by changing (in my case) Ultimate with one of the following:
- Ultimate
- Professional
- HomePremium
- HomeBasic
- Starter
If you want to change type (channel) you can change (in my case) Retail with one of the following:
- OEM
- Retail
If you do not want to be asked for a key in the setup whether one is installed with DISM or unattend file,or not, you need to change the 0 into 1 for the [VL] option.
On the http://code.kliu.org/misc/winisoutils/ site there is also a tool for this called Windows 7 ISO Image Edition Switcher:
The Windows 7 ISO Image Edition Switcher is a set of small binary patches (and a tool to apply these patches) that will convert an official Windows 7 ISO disc image into an official Windows 7 ISO disc image of another edition. The resulting ISO images are bit-for-bit identical with those posted on MSDN or TechNet, and their SHA-1 hashes should match the official hashes posted by Microsoft.
You can download it here.
If you want to know more about the ei.cfg file you can go to the microsoft technet site.
Ok that is it if you just want x86 or x64 bit versions, if you want both versions x86 and x64 we need to do allot more. I will go through the steps below
First of all we need to prepare the technician pc where we are going to create our multi bit, multi version Microsoft Windows 7 installation DVD.
- Download and install WAIK (Windows Automation Installation Kit) Download WAIK (1.66GB)
- Download and install an ISO extracting tool, I used 7-zip
- Download and install a tool to create ISO files (ultraiso)
- A Microsoft Windows 7 32-bit DVD or iso file
- A Microsoft Windows 7 64-bit DVD or iso file
- An empty DVD or a USB Stick of minimum 4GB
- Create a working directory
I created a “win7″ directory under my E drive and 2 subdirectory’s named”win7_x86” and “win7_x64”
Now let’s get started building the iso.
We will be modifying the 32-bit DVD because some of the Win32 installation components can’t run on the 64bit installation platform.
- Extract the files of the Microsoft Windows 7 32-bit DVD or iso file to e:\win7\win7_x86\
- Extract the files of the Microsoft Windows 7 64-bit DVD or iso file to e:\win7\win7_x64\
- Run WAIK command prompt (Run as Administrator if UAC enabled)
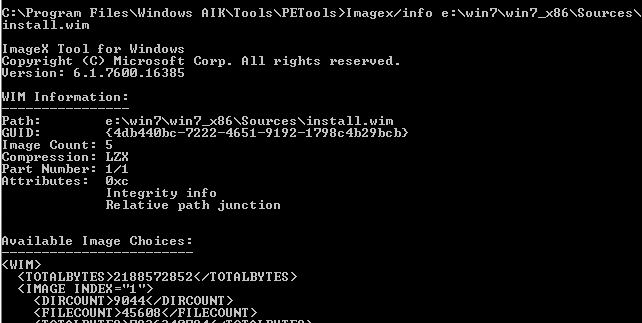
You can find the WAIK command prompt shortcut under Start -> All Programs -> Microsoft Windows AIK -> Deployment Tools Command Prompt - Every windows version that comes up in the list of OS version to choose from has an index number, we will need those index numbers to match the x64 version.You can find the index numbers by executing the following command in the WAIK command prompt
Imagex/info e:\win7\win7_x86\Sources\install.wim
you can find the complete output here: win7-all-versions-info
- Now we need the export function in Imagex to export the x64 WIM entries to the x86 WIM file.
We need to do this for every version:- Windows 7 Home Basic x64
Imagex/export e:\win7\win7_x64\Sources\install.wim 1 e:\win7\win7_x86\Sources\install.wim “Windows 7 Home Basic (x64)” - Windows 7 Home Premium x64
Imagex/export e:\win7\win7_x64\Sources\install.wim 2 e:\win7\win7_x86\Sources\install.wim “Windows 7 Home Premium (x64)” - Windows 7 Professional x64
Imagex/export e:\win7\win7_x64\Sources\install.wim 3 e:\win7\win7_x86\Sources\install.wim “Windows 7 Professional (x64)” - Windows 7 Ultimate x64
Imagex /export e:\win7\win7_x64\Sources\install.wim 4 e:\win7\win7_x86\Sources\install.wim “Windows 7 Ultimate (x64)”
- Windows 7 Home Basic x64
- Now that the win7_x86 WIM file contains both x86 and x64 versions you can rebuild the iso with ultraiso and burn it to a DVD-Rom or use my previous post to build a bootable USB drive.


Leave a Reply
You must be logged in to post a comment.